As an ERP admin, one of the foundational things to understand about your system is its environment, tenant, and the settings that control these components. In this blog, I’ll explore how you can access and start using the backend of a typical Microsoft Dynamics 365 Business Central system using the SaaS (Software-as-a-Service) model.
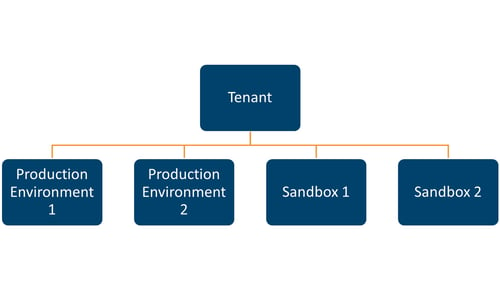
When you open your Business Central system and log in, you enter a production environment. Depending on your setup, you may have multiple production environments (often the case in multi-national companies) or UAT/Sandbox environments. All of your environments, though, are managed by one tenant.
Accessing the Business Central Admin Center
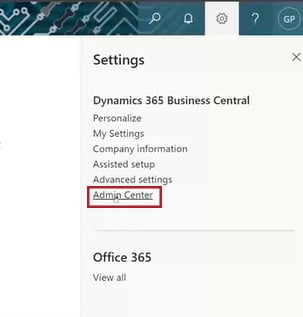
The easiest way to manage your environments is to use the Business Central Admin Center. The most straightforward way to reach it is to click the gear icon in the upper right corner of your screen while logged into Business Central and clicking Admin Center on the menu that appears on the right.
There are three types of permissions that allow users to access the Business Central Admin Center:
- Internal Administrator -- Used by your Partner. You cannot assign this permission to users.
- Global Admin -- The highest level of access. We recommend only giving this to a small number of users.
- Dynamics 365 Admin – This permission allows users to access the Business Central Admin Center and do other Microsoft 365 tasks.
If you need to assign one of these permissions to a user, you will need to go to your Microsoft 365 Admin Center (not the same as your Business Central Admin Center), accessible at https://admin.microsoft.com. You will need to be a Microsoft 365 admin to access this page.
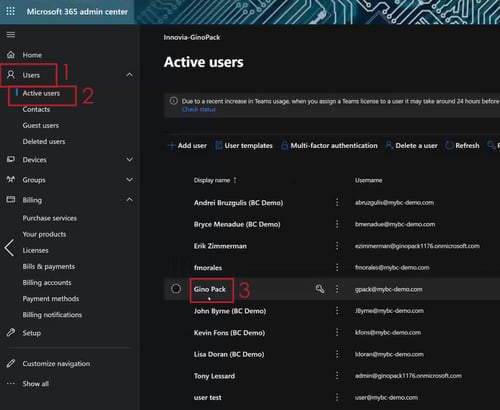
- Click Users (1) in the left menu.
- Click Active Users (2)
- Select the user you would like to add or change permissions for (3).
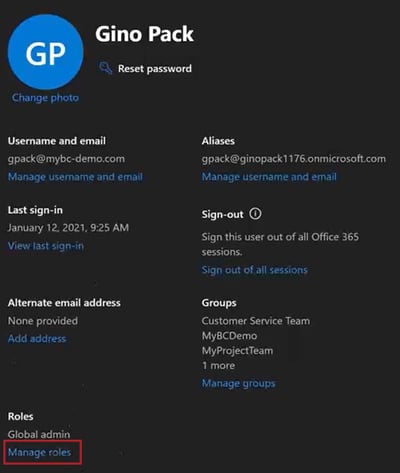
- In the menu that appears, find the section labeled Roles and click Manage Roles.
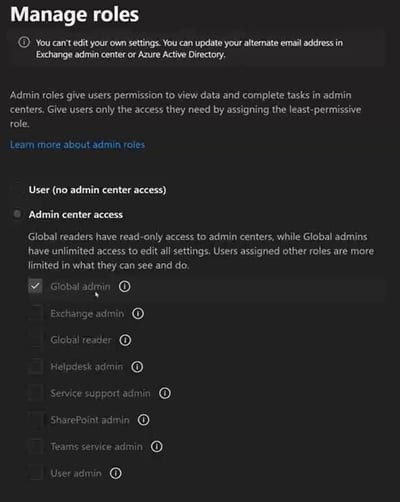
- Now you can see all the roles this user has assigned and make changes.
Managing Environments in Business Central Admin Center
When entering the Business Central Admin Center, you will see a list of all Production and Sandbox environments in your tenant.

When you click on one of them, you can learn all the technical details, such as the environment’s Azure region, application version, URL, and more. From this screen, you can also take several administrative actions such as:
- Create a Database Export – This creates a backup of your environment. Note that while you cannot restore to a Business Central On-Premises environment, you can restore to an on-premises SQL server to access the data if needed.

- Open a Support Ticket with Microsoft – You can create a new ticket, manage support contacts, or report a service outage.
- Configure your Update Settings – You can set your update window and update date.
- Rename, Delete, or Refresh – Make sure you know what you are doing here.
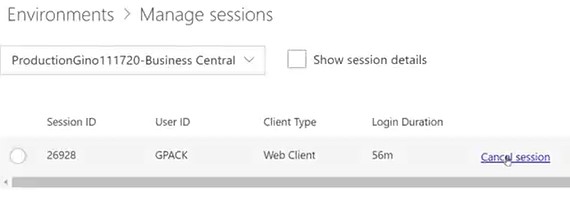
- View All Active Sessions – Clicking into this will show you all users with active sessions in your environment. It can be used as a troubleshooting tool if users are reporting problems accessing Business Central. You can even cancel active sessions, kicking users out of the system.

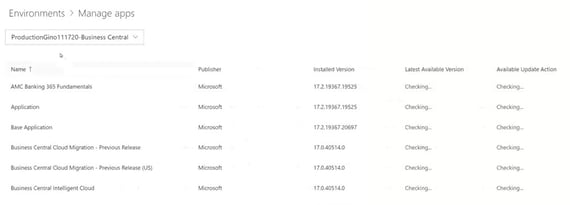
- Manage All Apps in Your Environment – One of the key benefits of Business Central is how extendable it is with apps that accomplish nearly any task you could imagine in your system. You can see all the apps in each of your environments by clicking the Apps menu option. Here you will see all the apps installed, their version numbers, and if there’s an available update to apply.

Want to Learn More About the Admin Tools in Business Central SaaS?
I hope this exploration of how to manage your environments in Business Central SaaS has been helpful to you. If you want to explore other powerful admin tools for this Cloud-based ERP, I recommend watching a recent webinar I presented on-demand. In it, I cover this process and many others in greater detail.


