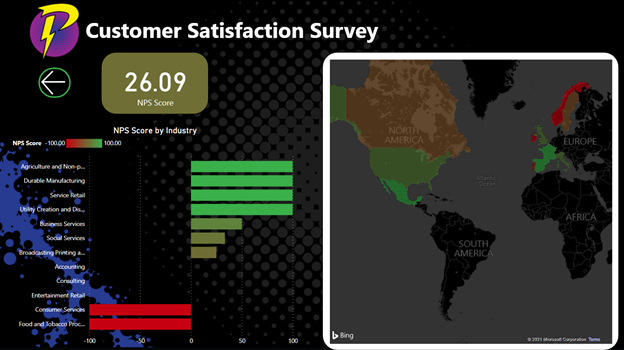
One of the most common customer loyalty and satisfaction metrics is the Net Promoter Score® (NPS). You've probably encountered this measure many times in surveys you've taken. Whenever you are asked how likely you are to recommend a company or service to a colleague or friend, you are likely answering a Net Promoter Score® question. This question is on a 0-10 scale based on how likely you feel you would be to recommend that company or service.
How is NPS calculated?
The "score" part of this metric is calculated like this.
- Every respondent who responded 9 or 10 to how likely they are to recommend is considered a "promoter." A simple count of these responses gives you your total promoters metric.
- Every respondent who responded 6 or below is considered a "detractor." Just like above, you count the number of responses in this category to get your total detractors metric.
- Now you need the total number of responses you received. Count them up to get a total response count.
- Now a little bit of math:
- Take the number of promoters and divide it by the total responses. Multiply this by 100 to move the decimal.
- Take the number of detractors and divide it by the total responses. Multiply this by 100 to move the decimal.
- Subtract your answer to step 2 from your answer to step 1. The difference is your Net Promoter Score®.
Your score will range from -100 (everyone answered 0-6) to 100 (everyone answered 10). The number itself is generally not that helpful on its own. Still, it is helpful for comparison, perhaps against your competitors, across regions, or for each of your customer service reps.
But how can you take this one step further by giving your team visibility into your customer satisfaction trends using this score? The answer: Power BI.
Using NPS in Power BI
With Power BI's powerful visualization tools and ability to connect different streams of data into one dataset, you can begin to use this calculation to understand how each part of your business is doing in terms of customer loyalty. Break down survey results, perhaps collected with the innovative tool Microsoft Customer Voice, by anything you track in your system, such as:
- Customers' industry
- Customers' total amount spent at your company
- Customers' location (region, state, city, and more)
- Salesperson or project team assignments
The first step is obviously to get your survey results into Power BI. This can be done many ways depending on how you have recorded your data, from the Dataverse connector to a SharePoint list to an Excel sheet. We won't go into the specifics of that in this blog, but if you want to know more, feel free to reach out.
Now we have the data we need, but Power BI does not have a default calculation for NPS®, so how can you get this crucial metric into your system?
Here's where the DAX (Data Analysis Expression) language in Power BI comes into play. It is the code used by Power BI to calculate measures based on the data you've pulled into your model.
Don't panic! It's not as intimidating as it sounds, and we're here to help!
Here's how to add a measure. In Power BI Desktop, click into the Modeling tab and then select New measure.

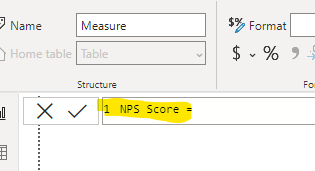
You're now going to be in the formula bar. Everything to the left of your = is your measure name. You can just call it something like "NPS Score" for this exercise, but the choice is yours.

Now here's the part you've been waiting for. To add your NPS Score measure, cut and paste the below into your measure formula bar:
NPS Score =
//be sure you have a question in your survey asking "How likely would you be to recommend us?" with a scale of 0-10
VAR detractors = CALCULATE(
COUNTROWS('Your Table'),
FILTER('Your Table',
'Your Table'[NPS]<=6)
)
//don't forget to make your NPS question column into a whole number data type
VAR passives = CALCULATE(
COUNTROWS('Your Table'),
FILTER('Your Table',
'Your Table'[NPS]=7)
)
+CALCULATE(
COUNTROWS('Your Table'),
FILTER('Your Table',
'Your Table'[NPS]=8)
)
VAR promoters = CALCULATE(
COUNTROWS('Your Table'),
FILTER('Your Table',
'Your Table'[NPS]>=9)
)
VAR total = COUNTROWS('Your Table')
VAR score = (promoters/total*100)-(detractors/total*100)
RETURN If(
ISBLANK(score),
0,
score
)
This code is also available on Github if you prefer.
Now, replace the references to 'Your Table' with the name of the data source you are using. Make sure the column with your NPS results is called "NPS." If it is not, you will want to change the code where it references [NPS] to your column name in brackets ([]).
You can use this measure with any visualization to get the NPS® score data you want to see!

What Next?
This measure is just one of the fantastic ways Power Platform helps you understand your customer, employee, donor, or other stakeholder feedback. You can move from simply getting data to understanding data, which lets you make data-driven decisions for your organization. Move forward with confidence with easy access to the analytics that matter.
If you want to know more about surveys for Power Platform and Microsoft Dynamics, check out our Customer Voice offerings.
To learn more about the Power Platform as a whole, including ways Power Automate can help you automate your survey distribution, visit our Power Platform page.


