Few things are more frustrating than back-and-forth emails with customers, partners, and vendors about when to hold a meeting. What’s your record for the number of emails sent before a meeting invitation goes out?
Luckily, there are many solutions out there to make this process seamless, and for those of you already using a Microsoft 365 Business Standard (or above) plan, you already have a great option in Microsoft Bookings. It gives you a link to share with your collaborators where they can schedule an appointment (with a Microsoft Teams meeting) right on your calendar.
Setting it up is easy! Let’s take a look at how you can get started.
Setting Up Your Bookings Calendar
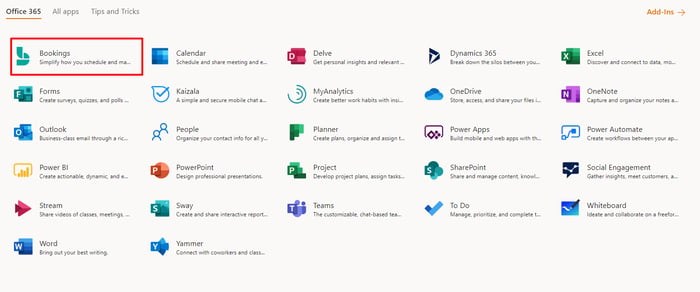
First, you need to access the app online. Simply go to https://www.office.com and sign in with your Microsoft account. Once you are in, you will see a listing of apps across the top of the window. Since this is your first time using Bookings, you will likely need to click All Apps to see it.

Then you will see Bookings. Click that.
You will see a product page for Bookings appear. There should be a button that says Get It Now. Once you’ve clicked this button, a popup appears asking you to choose or create a calendar.
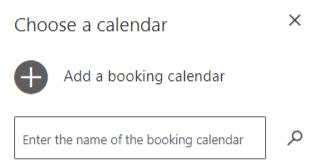
If you are an administrator of another calendar in your organization, you could search for it here and enter that calendar. Otherwise, click Add a Booking Calendar.
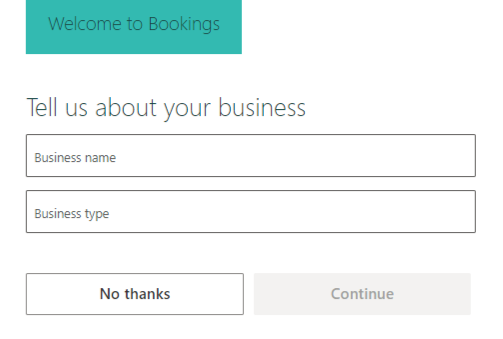
All you need to do is define your business name and type. Note that the name you select is what appears at the top of the page, so if you are making separate calendars for different people in your organization, you may want the business name to be the person’s name.
As you begin typing in the Business Type field, suggestions will appear. Select the option that fits your business best.
Once you are past this popup, you will need to configure your Business Information. In the screen that appears, click that option on the left menu.
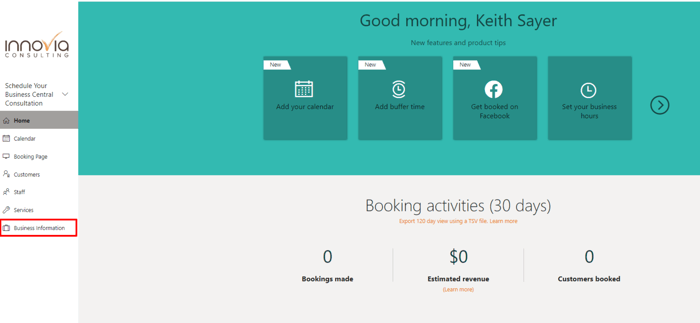
Fill out as much information as you can on this screen.
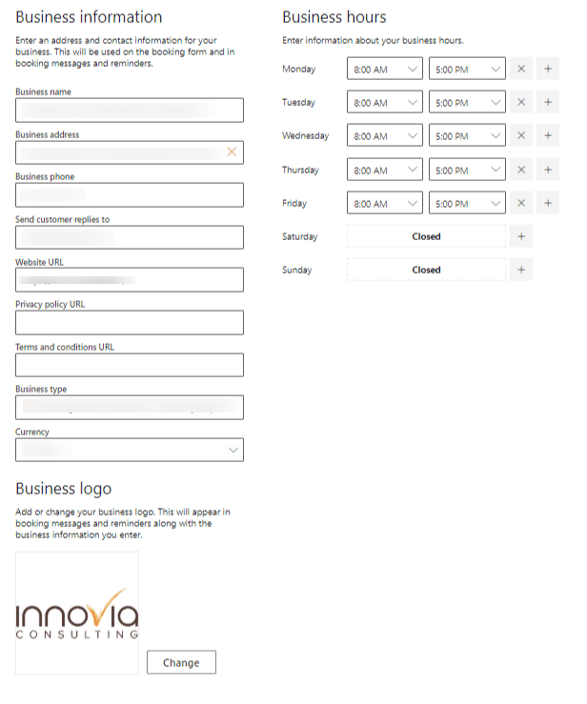
- All the fields under Business Information will help your attendees reach you. Most importantly, the Send customer replies to field allows customers to reach you by replying to Bookings emails. Be sure this field includes a valid email address.
- You also have the option of uploading your Business Logo (or any picture you would like to appear at the top of your public-facing page.
- On the right side are your Business Hours. Bookings will not allow a meeting to take place outside of these hours. That means, for example, if you set the end time to 5 pm, the last available slot for a 30-minute appointment would be 4:30 pm. You can adjust these times to fit your general schedule and even add multiple ranges per day (for example, 8 am-12 pm and then 1 pm to 5 pm M-F).
The next section that needs configuration is your Booking Page. Click that option on the left menu. At this point, I recommend you select the colors that fit your brand best in the Customize your page section before publishing the page. Then scroll down to the Scheduling Policy section.
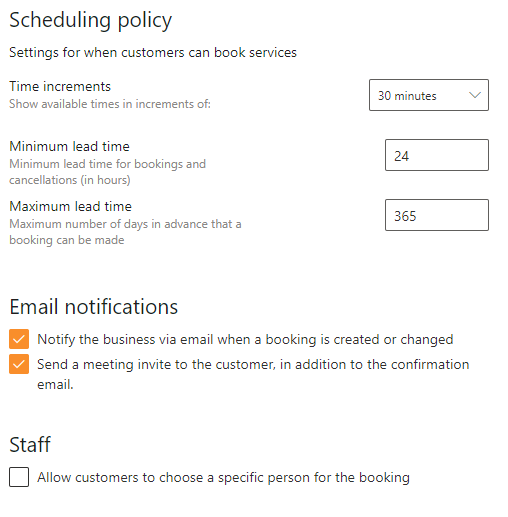
- The Time increments setting affects the smallest time between meeting options. So, if it is set for 1 hour, it will offer the first hour to the customer, then the next option would be 1 hour later if you are still free, even if the meeting is 30 or 15 minutes.
- Minimum Lead Time affects how much advance notice is required for a booking. You will want to think about how much time your staff takes to prepare for meetings when deciding what to select.
- Likewise, Maximum Lead Time is how far in advance your Booking calendar operates. In my example, I set it to 365 days, which means visitors will not be able to schedule a meeting that is more than 1 year from now.
- I recommend selecting both options under Email notifications. The first checkbox controls whether the business receives an email when a booking is made or changed, which is helpful for tracking, and sending a meeting invite helps ensure the best possible attendance rate.
- Under Staff, the option to Allow Customers to choose a specific person for the booking is highly dependent on your needs. For example, if you have one shared calendar with many people that offer similar services/meetings, this might be useful so the customer can choose the right person. If only one person is using a Bookings calendar, it’s simpler to just leave it off.
Adding Staff and Services to Your Bookings Calendar
Now that your calendar is ready, you need to add the staff who will use it. As I mentioned, this could just be one person or several. You as the creator are added by default, so if you don’t have anyone else to add, you can skip this step.
Click the Staff option in the left menu and select +Add staff at the top of the screen that appears. You’ll see a popup like this:
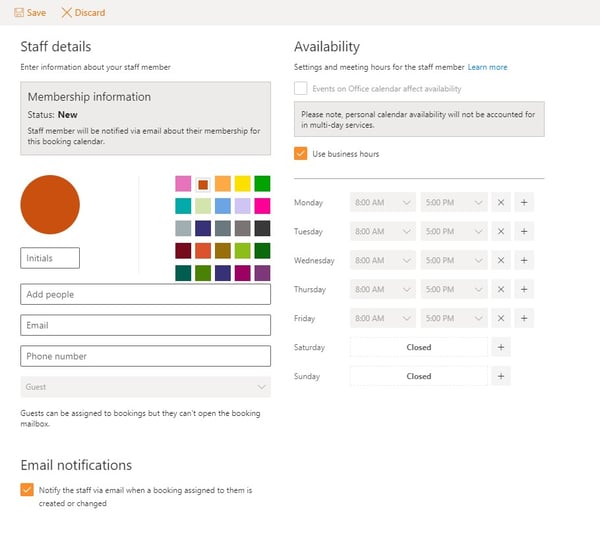
The easiest method if your staff person is on your Microsoft 365 plan is to simply type their name in the Add people field. You should see them appear; select them by clicking their name. You can change any of the other options you wish, but it works well with the default options, which base the staff member’s availability on his or her Office calendar. Be sure to Save.
Lastly, you need to define your Services. Start by clicking that option in the left menu, then on the screen that appears click +Add a service. You should see this form appear:
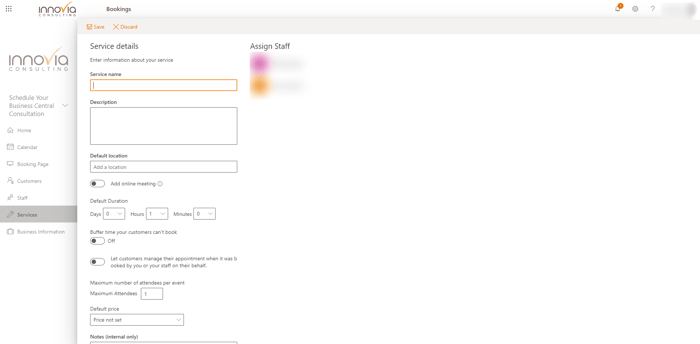
It’s not as intimidating as it looks! A lot of settings are optional.
- First, enter your Service Name, Description, and Default Location (for virtual meetings, I recommend setting this as Virtual Event).
- If you are scheduling an online meeting, switch on the Add online meeting toggle. This will create a Teams meeting for your booking.
- Set the Default Duration and any buffer time as you wish.
- I recommend only setting your Maximum Attendees to 1. Going with more can make the invites a bit confusing.
- You can set a Default price if you wish.
- As you scroll down, you’ll see reminder options. Personalize these as you see fit. You can add reminders for both the customer and the staff person.
- If you want a more personal confirmation, write something in the Additional Information for Email Confirmation field. This text will go to the customer with your confirmation email.
- Unless you have a reason not to, stick with Use the default scheduling policy at the bottom.
- Once you are finished, hit Save at the top.
Using Your Bookings Page
Once you have added all the staff and services you need, you are ready to go live! Go back to the Booking Page screen from the left menu.
Publish your page if you haven’t already. Then, you will see a button to take you to the live page as well as a URL you can share with your customers, embed in your signature, or use in promotional emails.
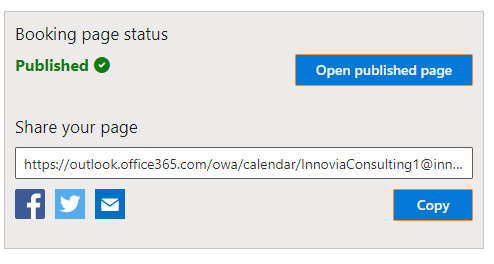
Once you start getting bookings, you will be notified AND the event will automatically be added to your (and your guest’s) calendar, saving you a ton of time setting up a simple call!
I hope this guide has been useful to you. I’m excited to see more businesses use this great Microsoft 365 feature. Feel free to reach out if you have questions or ideas.


