Report scheduling in Business Central / NAV is easier than you think. With just a few simple steps, your users can set up reports to arrive when and as frequently as they need them!
I find that many users don’t see these options because they don’t stick out in the interface, so I wanted to share with you two methods for scheduling reports so you can start saving time in your day.
Method 1: Schedule a Single Report to Run Now or Once in the Future
To start this first method, pull up any report in Business Central
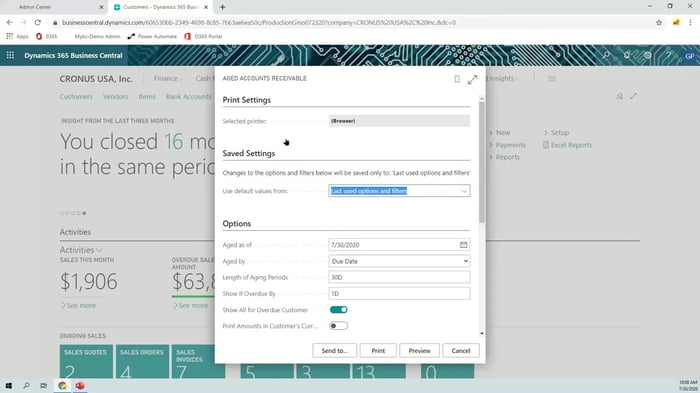
Once you verify all the parameters of the report, instead of clicking Print or Preview, which would generate the report right now and force you to wait, you can select Send to … and the following screen appears:
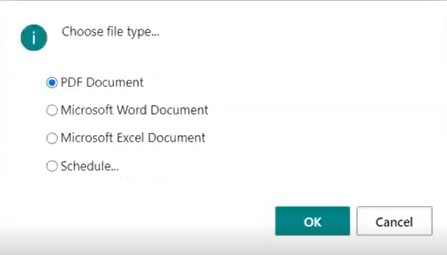
Here you have the option to send the report to an external format, or you can select Schedule … When you do and click OK, a scheduling dialogue box appears.
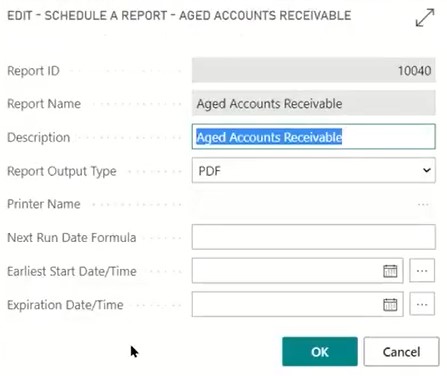
As you can see, this menu allows you to decide what format you want the report to be in (I chose PDF), and then allows you to define parameters for when you want it to run. If you have a specific future time in mind, feel free to insert it, but if you want the report to run now, you can type t into the Earliest Start Date/Time box and the current date will appear. Then when you hit OK, the report will start running in the background, and you will receive this confirmation message:

Now you can complete your other tasks. Once the report is complete it appears in your Report Inbox, which appears on your Role Center in Business Central.
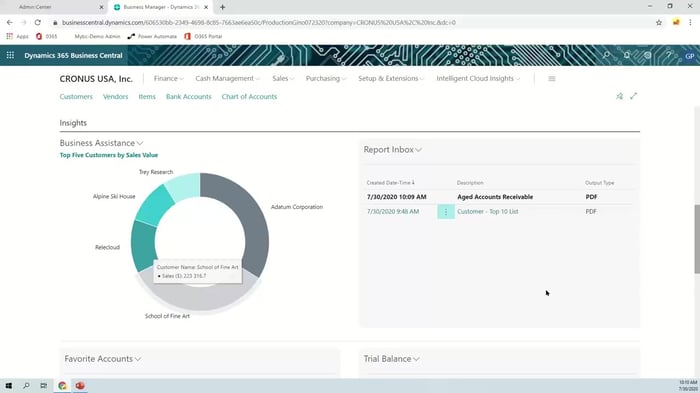
As you can see, my report has been delivered. I can access it directly from this inbox. The benefit of scheduling it even though I wanted it to run now is that I didn’t have to wait for it to run, which can be a big help for large reports that take time to process.
Method 2: Scheduling Recurring Reports
To schedule a report to run according to a specific schedule, we use the Task Scheduler. First, you will need to navigate to the Job Queue Entries screen.
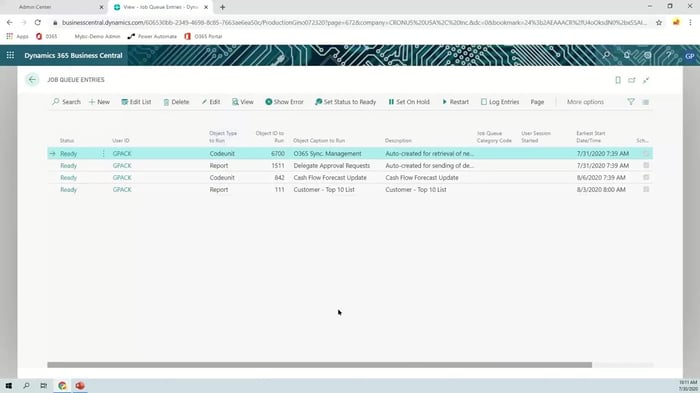
To start scheduling a report, select +New at the top. A Job Queue Entry Card will appear.
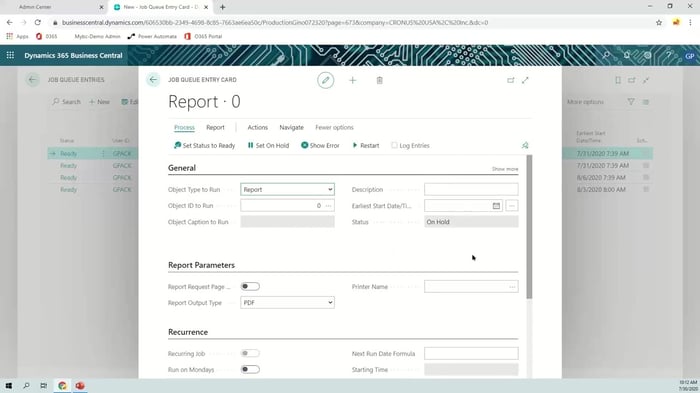
- First, confirm that the Object Type to Run field is set to Report.
- Then find the object ID of the report you want to run and enter it into the Object ID to Run. If you don’t know the ID, click the three dots on the right side of the entry box to look it up.
- Next, select the Earliest Start Date/Time to define when you want this report to run for the first time. If you want the first report to run now, just type t again to bring up today’s date.
- Set any Description you want to help people know what this job does. I recommend just inserting the name of the report and the frequency (e.g. Customer Top 10 List – Weekly).
- Under Report Parameters, if you toggle Report Request Page, it will pull up the report parameters/options for the report you have chosen just like when you run a single report.
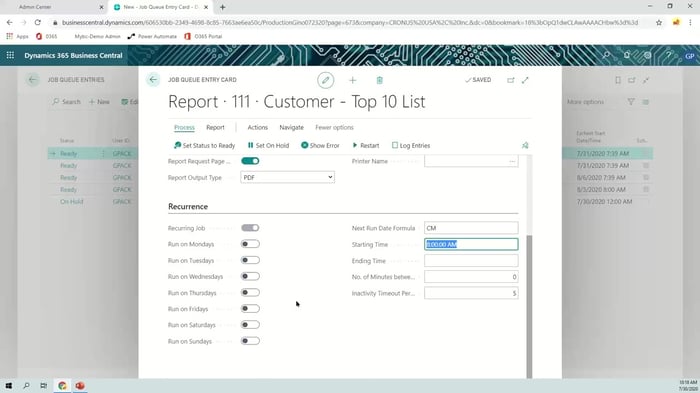
- Once you’ve configured that as you wish, scroll down to the Recurrence menu. Here you can determine which days of the week your report will run by toggling each day on or off. Then select a Starting Time to determine when your report runs on those days.
- As of Business Central Version 14, you can also use the Next Run Date Formula field to define other forms of recurrence. For example, if you input CM (for Current Month), the report runs on the first of each month.
- When you are finished, click Set Status to Ready at the top of the card, and your report will start working. If allowed by your settings, the first report will run right away.
- When the report finishes, it will appear in your Report Inbox on the Role Center.
Where to Go from Here …
I hope this tutorial has been useful to you and your users. If you would like to see these processes in action, I invite you to review the webinar I gave on this topic that is now available on-demand.
I also touch on more advanced options you might consider if you have specific needs for scheduled reporting. And as always, feel free to reach out if you have any questions.


