This blog is a follow-up post to my guide on using Animations in PowerPoint.
Today, we are looking at Motion Paths, the last major type of animations in PowerPoint. Motion paths, like other animations, can be applied to objects, such as text, shapes, and pictures. There are six primary types of Motion Paths in PowerPoint: Lines, Arcs, Turns, Shapes, Loops, and Custom Path.

These options allow you to make an object move in just about any way you could want. Let’s look at how it works!
How to Create a Motion Path
Start by selecting the object you would like to add a Motion Path to. Then go to the Animations tab in the main navigation ribbon and select the more options drop-down arrow in the bottom right corner.

This will reveal your motion path animation options. Go ahead and choose your preferred type of motion path from the options listed.
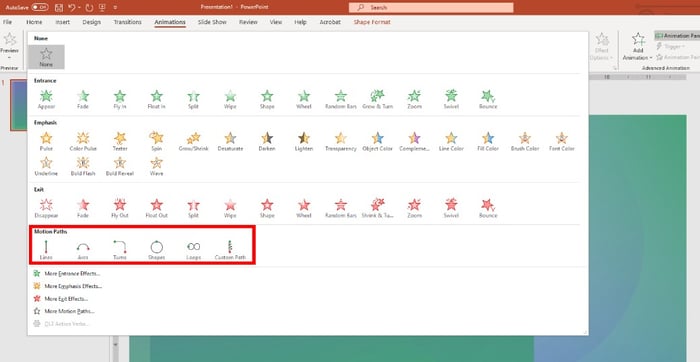
I am going to start with lines since they are arguably the easiest to use.
I select Lines and the animation is added to my slide. If you are following along, you should see a motion preview like this.

You should also see a dashed line appear with a green dot on one end (the starting point) and a red dot on the other end (the endpoint). Move either point around by clicking it and dragging it to the desired location.
Pro tip: Hold the shift key while you move either endpoint to keep the same angle while making the line shorter or longer.

If you want to change the direction, I recommend using Effect Options, located to the right of the Animations tab in the main navigation ribbon. From here, you can decide if you want to make the object move up, down, left, or right.
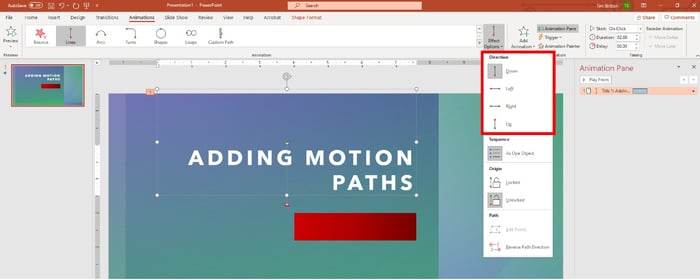
Then, use the same click and drag process to get to the precise location where you want the object to move.
That is the basics of motion paths, but other features under the Effects Options tab give you even more options for customizing motion paths.
Let’s review them.
Sequence
If you have multiple bullet points or paragraphs, you can choose to move those objects either one section at a time or all together.
Locking and Unlocking the Origin
When your Motion Path is unlocked (and it is by default), it will move every time you move the object. Locking the origin lets you move the object while keeping the Motion Path in the same place.
Edit Points (Available for all Motion Paths except the straight line)
Edit points allow you to move any specific point related to your motion path. This is a useful feature for more advanced motion paths.
Reverse Path Direction
This option automatically switches your start and endpoint.
Want even more options?
There are even more pre-built motion path options in PowerPoint! Here’s how you find them. At the bottom of the Animation menu, click More Motion Paths.
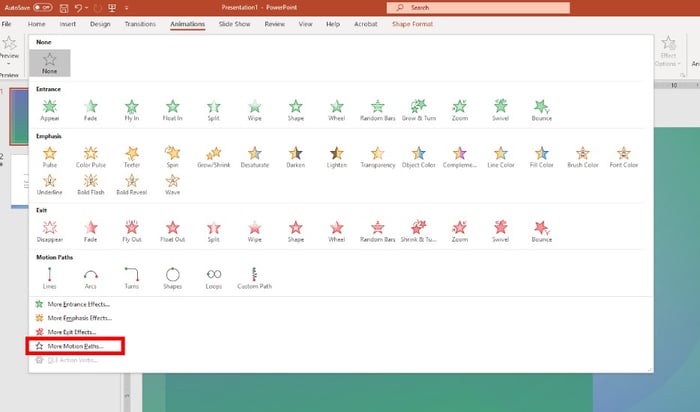
This pulls up a menu with many more options to choose from.
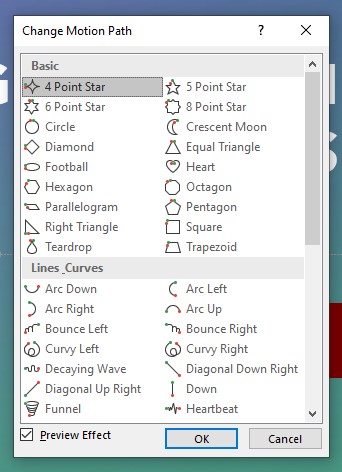
Now, I will edit one of the more complex options as an example.
I choose the Turns option to add motion to the red rectangle. Then I change the direction to Up in the Effect Options menu.

I also dragged the end out because I wanted it to cover more ground before coming into place. In this example, I chose to start the animation outside the slide area and then come in.
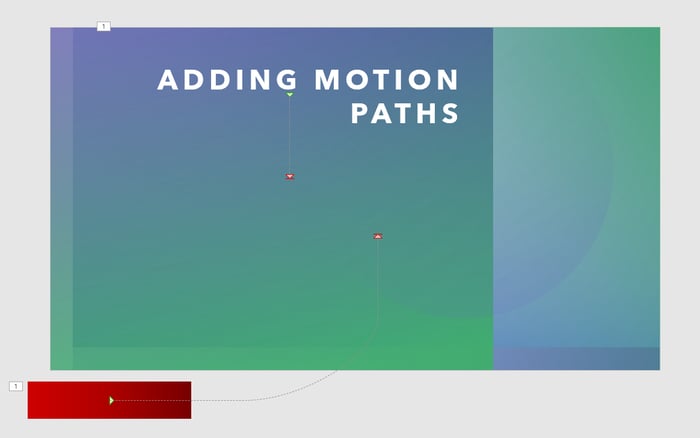
When you view this as a slide you will not see the red rectangle until it appears in the frame. As you can see in the example below.

Custom Paths
Lastly, let’s explore Custom Paths.
In my new example, I have a red square and want it to move along a bar graph. To get started, select Custom Path in the Animations tab.
To make straight lines, simply click each desired point in the path. If you want to make a free path instead, click again to switch to free draw mode (click again if you want to return to making straight lines). Finally, double click when you are done building your path.


I hope you have found some inspiration to enhance your PowerPoints using Motion Paths. If you have any questions about Motion Paths, please drop an email at info@innovia.com.
Happy PowerPointing!


